A roofline inspection should feel like a clear site visit, not a guessing game. The aim is simple: understand how the roof edge is performing, spot obvious risks early, and leave with a practical next step rather than a cloud of vague concern.
Most homeowners arrive at this point with a few sensible questions. What will the inspector actually look at? Do you need ladders or scaffold straight away? Should you move cars, clear access, or gather photos before the visit? Those are the right questions, because a good inspection is really a workflow: observe, assess, explain, then decide.
For broader planning context, teams can compare guidance from Google Search Central before choosing a workflow.
In most cases, the visit focuses on the parts of the roofline that manage weather at the building edge: gutters, downpipes, fascias, soffits, verge details, joints and fixings. The purpose is not to create drama around every mark or drip. It is to work out whether you are dealing with simple maintenance, a local repair, or a wider issue that needs more attention.
Below, I will walk through how booking usually works, what gets checked on site, how access and safety are handled, and what kind of recommendations you can expect afterward. If you are arranging a first visit, this should make the process feel far more legible.
How to book your roofline inspection
Booking is usually straightforward, but the quality of the first conversation matters. The more clearly you describe the property and the issue, the easier it is to plan the right kind of visit.
Related implementation details are also covered in WordPress documentation, which helps keep tool decisions grounded in established practices.
When you get in touch to book an inspection, it helps to have these details ready:
- Your contact details. Name, preferred phone or email, and the best way to confirm the appointment.
- Preferred dates and times. Give a couple of workable windows rather than one highly specific slot.
- A short property description. Detached, terraced, period, listed, or modern extension can all affect access and materials.
- The location of the concern. Front elevation, rear corner, conservatory side, bay window area, or above a porch is far more useful than “the gutter somewhere at the top.”
- What you have noticed. Overflow, staining, sagging, dripping joints, peeling paint, loose sections, or damp marks below the eaves.
A real-world example: if you tell the inspector that the rear gutter overflows only during heavy rain and the section sits above a conservatory, that changes the access picture immediately. It is the difference between turning up prepared and turning up to discover the obvious constraint five minutes late.
If you are still deciding whether you need a visit, the home page gives a useful overview of the kind of roofline work RC Grant & Sons handles across different property styles.
What inspectors usually check during the visit
A solid roofline inspection follows the water path. It starts with what can be seen from the ground, then moves into closer checks where safe access is appropriate and necessary.
Visible damage and wear
The first layer is a visual read of the roof edge. Inspectors are looking for clues that tell them where the system is under stress.
- Sagging or misaligned gutter runs. These can point to loose brackets, poor fall, or sections holding water.
- Staining on walls or soffits. Repeated overflow or leaking joints often leave visible marks below the problem area.
- Cracks, splits, or open joints. Small connection failures can create persistent leaks.
- Fascia or soffit deterioration. Peeling finishes, soft spots, gaps, or distortion may suggest moisture is getting where it should not.
- Vegetation or debris buildup. Moss, leaves, and plant growth are the roofline equivalent of the system filing a complaint.
Drainage and water movement
Gutters are not decorative trim. They are a drainage route, and inspectors want to know whether that route is working cleanly.
Typical checks include:
| Inspection area | What is being checked | Why it matters |
|---|---|---|
| Gutter fall | Whether the run slopes correctly toward the outlet | Poor fall can leave standing water and repeat overflow |
| Outlets and downpipes | Signs of blockage, slow discharge, or backing up | Water may spill from the gutter even if the gutter itself is clean |
| Joints and corners | Leaks, movement, worn seals, or poor fit | Connections are common failure points |
| Wall below the eaves | Streaking, splashback, or damp indicators | The wall often shows the water path more clearly than the gutter does |
Sometimes the obvious symptom is not the real cause. A corner that overflows may be reacting to a blocked outlet farther along the run, or a drip at one joint may be caused by movement from a bracket that has loosened nearby.
Fixings, attachments and adjacent details
This is where the inspection becomes more than a quick glance upward. Inspectors usually want to understand how the visible roofline parts are attached and whether nearby details are contributing to the issue.
- Bracket spacing and security. Loose or widely spaced supports let the gutter deform under load.
- Condition of fixings. Fasteners, clips and connections need to hold the system in the right line.
- Junctions with roof coverings. The edge detail only works if nearby tiles, slates, or flashings are also behaving properly.
- Substrate concerns. Where safe access is possible, inspectors may look for signs that timber or backing material behind the fascia has been affected.
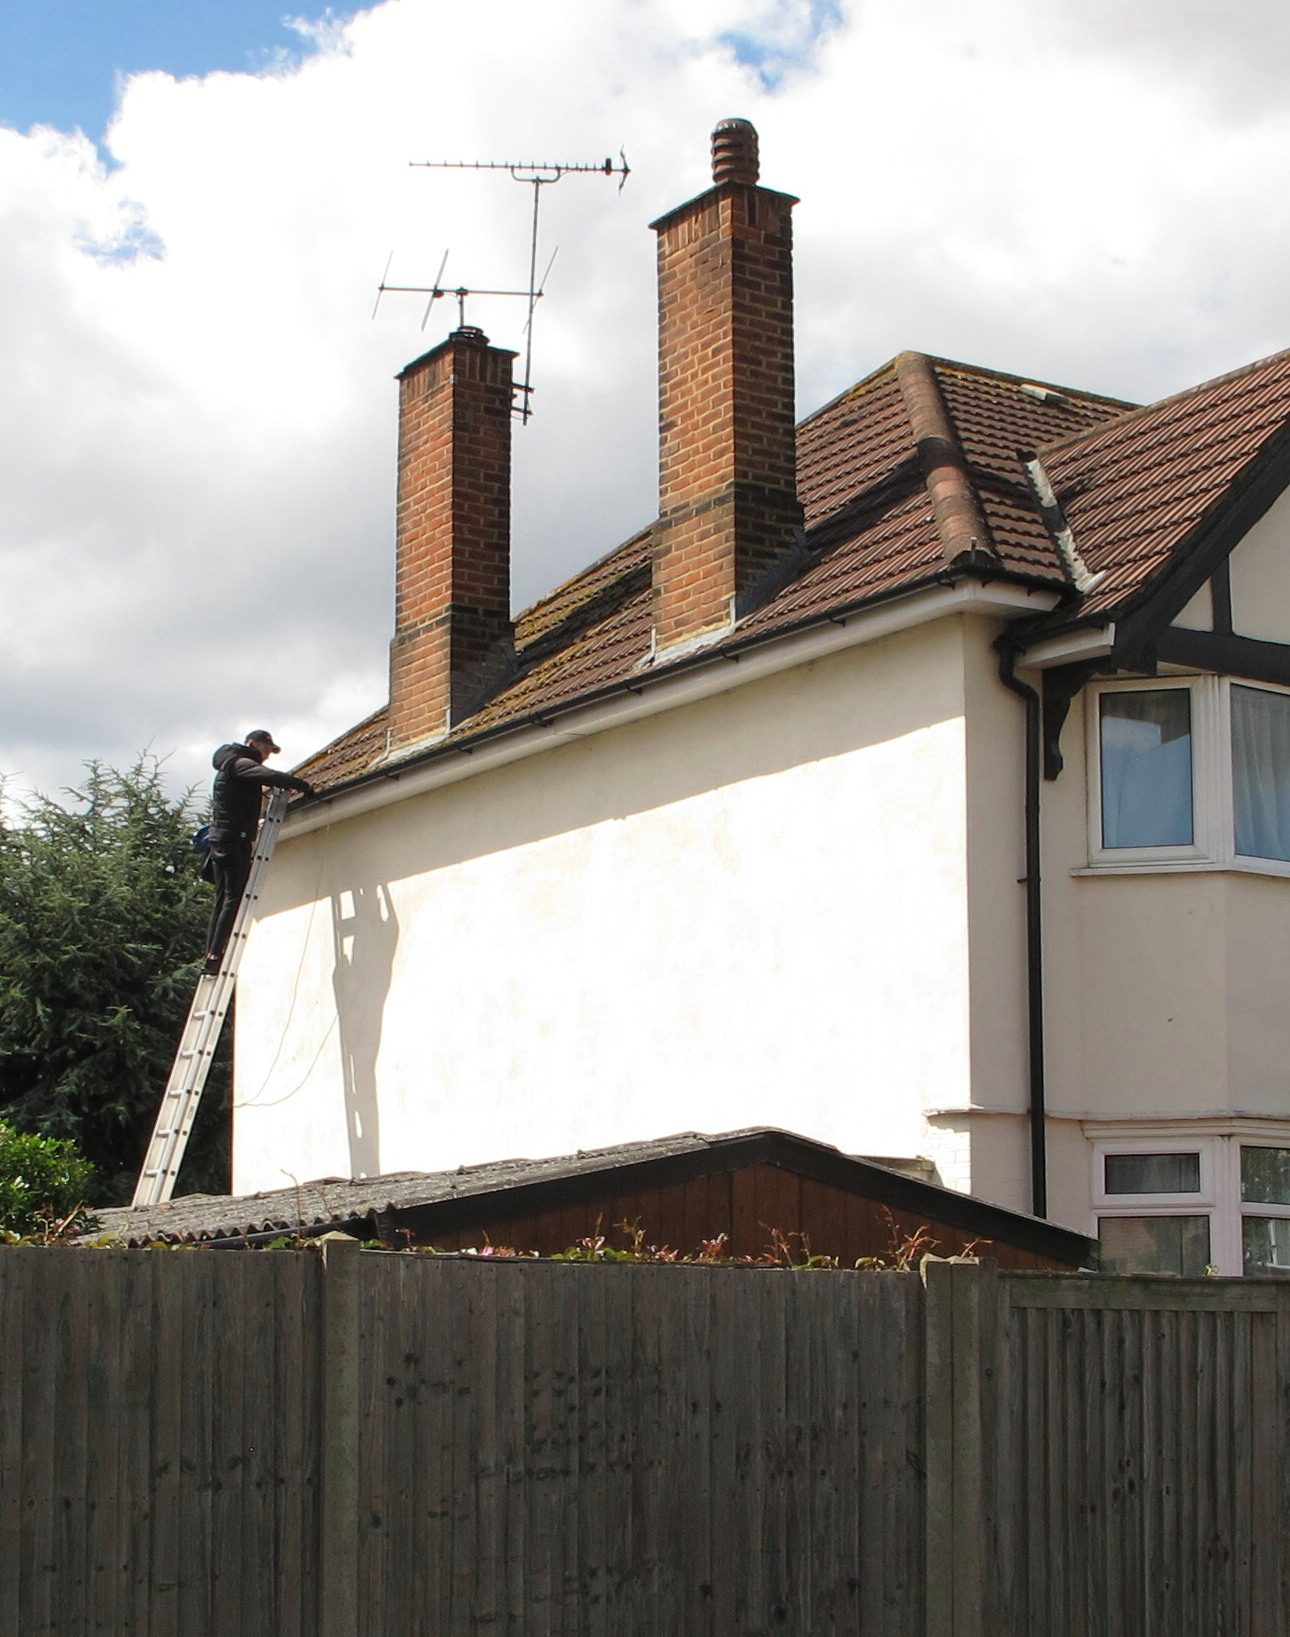
Safety and access considerations
This part matters more than homeowners sometimes expect. A good inspection is careful about access because the point is to gather accurate information safely, not to improvise a risky site setup for the sake of speed.
Many first visits begin with a ground-level assessment. From there, the inspector decides whether closer access is necessary and what form that access should take.
- Ground access may be enough for an initial diagnosis. Obvious sagging, staining, blockages and failed joints can often be spotted from below.
- Ladder use depends on the property and the task. Height, ground conditions, nearby structures and obstacles all affect what is appropriate.
- Some properties need more planning. Conservatories, narrow side passages, uneven surfaces, extensions and planted borders can all change the access method.
- Hazards should be flagged early. Overhead cables, fragile roofing, loose paving, locked gates, pets and parked vehicles are all useful to mention beforehand.
The homeowner preparation here is refreshingly unglamorous:
- make sure gates can be opened if rear access is needed,
- move vehicles away from the immediate working area where practical,
- clear small items from paths and around downpipes,
- let the inspector know about anything unusual before the visit.
What you should not do is climb up for a “quick check” the day before. Roofline problems are not improved by adding a separate accident to the diary.
How recommendations and next steps are usually shared
Once the inspection is done, the useful part is the explanation. You want to come away knowing what was found, how serious it appears, and what kind of next step makes sense.
Recommendations are often communicated in a simple format:
- What was observed. For example, blocked outlet, leaking union, decayed fascia section, or loose brackets on one elevation.
- What that likely means. Routine cleaning, local repair, replacement of specific sections, or a need for more detailed follow-up.
- What should happen next. A quotation, a repair recommendation, monitoring advice, or a broader assessment if the issue appears to go beyond the roofline alone.
In many cases, the conversation is not “everything is urgent” versus “nothing is wrong.” It is more structured than that. Some items may be immediate because they are actively letting water track back toward the building. Others may be sensible planned work that can be scheduled and priced without panic.
If you like to keep photos, notes and quote comparisons organised after the visit, a neutral digital tool such as a web app generator can be a useful resource for turning loose inspection details into a simple action list.
If the findings are unclear or you want to talk through the options, it is sensible to follow up through the contact page with the specific areas discussed during the inspection. Clear follow-up questions usually get clearer answers.
Photos and notes to gather before the inspector arrives
A little preparation improves the visit because it gives the inspector a timeline, not just a snapshot.
Useful things to gather beforehand include:
- Photos from ground level. Take the whole elevation first, then closer shots of the area where you have noticed a problem.
- Notes on timing. Does the issue happen only in heavy rain, after wind-driven rain, or whenever there is a steady downpour?
- Details of previous work. Earlier cleaning, patch repairs, repainting, or gutter replacement are all relevant.
- Recent changes to the property. Extensions, roof work, tree growth, or changes to drainage can alter how water behaves.
One practical example: if you have photos showing a dry wall in spring and a staining line after the first heavy summer storms, that before-and-after record is far more helpful than trying to remember when the issue started. The same is true if a problem began soon after another contractor worked nearby.
Key takeaway: expect a clear process, not a mystery
A roofline inspection is usually a disciplined sequence: book the visit with useful detail, let the inspector read the visible clues, allow safe access decisions to shape the check, and then work from findings to recommendations. That structure matters because it keeps the diagnosis grounded in what can actually be seen and tested.
If you prepare a few notes, take sensible photos, and make access straightforward, the visit becomes much more efficient. And if the inspection identifies an issue, you are in a better position to decide whether the right answer is maintenance, local repair, or a more involved next step.