The useful question is not whether roofline work sounds disruptive. It is whether the process is clear enough for you to judge scope, timing, and next steps before anything starts.
That is how I would frame it for most property owners. A sensible roofline project begins with evidence, not assumptions: what is actually worn, what still has service life left, how access affects the work, and which finish is the best fit for the building in front of you. If you are comparing options after browsing the main site, this guide should make the workflow easier to follow from the first visit through to handover.
If you are still sorting out the terminology, it helps to separate the main parts of the roof edge. Rain gutters manage water runoff, while the fascia and soffit help protect and finish the roofline around the eaves. Most projects involve those parts working together rather than one isolated component in a vacuum.
| Stage | What usually happens | What helps keep it efficient |
|---|---|---|
| 1. Assessment and measurements | Condition checks, basic diagnosis, access review, and measurements | Share photos, note where leaks or staining appear, and mention any access constraints early |
| 2. Options and materials | Repair versus replacement scope, finish choices, and detail matching | Decide what matters most: appearance, longevity, maintenance level, or close matching to existing details |
| 3. Preparation and site protection | Access setup, protective coverings, working area planning, and material staging | Keep paths clear, move vehicles where practical, and confirm any rear or side access beforehand |
| 4. Installation and quality checks | Repairs or replacements are completed, then checked for line, fit, and water flow | Allow the team to work methodically rather than rushing the visible finish |
| 5. Handover and next steps | Final walk-through, maintenance guidance, and any follow-up recommendations | Keep notes, photos, and any questions together so the close-out is easy to review |
Step 1: assessment and measurements
A good starting visit is less dramatic than many people expect. The aim is to establish the condition of the roof edge, understand how water is moving, and identify what is causing the visible symptoms. That may include sagging gutter runs, leaking joints, soft or weathered fascias, loose fixings, stained walls below the eaves, or details that have simply reached the point where repeated patching stops being the reasonable default.
Measurements matter here because even small differences in line, projection, and junction details can change the fit of replacement sections. Access matters too. A straightforward front elevation and a rear roofline above a conservatory are not the same job, even if the materials list starts in roughly the same place.
The most useful thing a property owner can do at this stage is provide context. When does the problem show up? Is it overflow in heavy rain, staining after wind-driven weather, a loose section noticed during cleaning, or a longer-running issue that has started to affect the finish below? Clear inputs usually lead to a cleaner diagnosis.
Step 2: discussing options and materials
Once the assessment is clear enough, the next decision is scope. Some properties need a local repair. Others are better served by replacing a longer run so the line, brackets, joints, and finish all work together. The question is not which option sounds smaller. The question is which option solves the actual failure without creating avoidable repeat work six months later.
This is also where material and detail choices are discussed. The best fit depends on the building. On a simpler modern elevation, the priority may be a clean finish with low ongoing maintenance. On an older or more characterful property, proportion, profile, and visual consistency can matter just as much as raw durability.
Three decision criteria usually help:
- Condition. Is the issue isolated, or does it run through multiple sections and fixings?
- Compatibility. Will the proposed material and profile sit comfortably with the existing property details?
- Future upkeep. Are you aiming for the lightest maintenance burden, or for closer matching to what is already there?
It is reasonable to ask what changes the price or timeline most. Common drivers include difficult access, hidden substrate repairs behind failed sections, the number of corners and junctions, and whether the work needs to be phased around adjacent features such as porches, conservatories, or narrow side passages.
Step 3: preparation and site protection
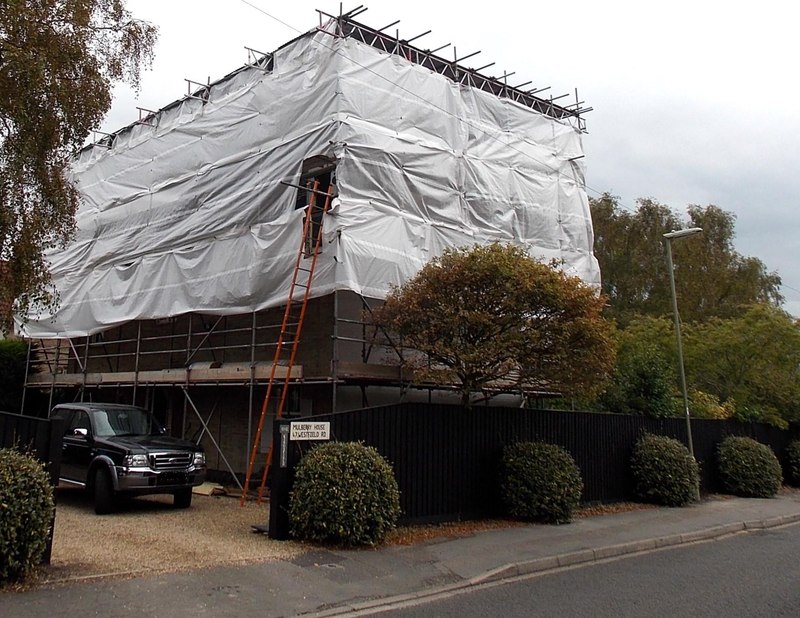
This stage is easy to undervalue until you see it handled well. Careful preparation protects the property, reduces avoidable mess, and makes the working day more predictable for everyone involved. Depending on the access plan, this can include ladders, scaffold, protective sheeting, ground coverings, and a sensible material layout that does not turn the driveway or pathway into an obstacle course.
Access decisions should be governed by the site conditions and the task, not by optimism. The Health and Safety Executive’s work at height guidance is a useful reminder that safe setup is part of the job, not an optional extra. In practice, that means the preparation phase may take longer on properties with tight side access, uneven ground, overhead obstructions, or delicate areas below the working zone.
If you want the process to run more smoothly, this is where small practical steps help. Clear the immediate working area, keep gates unlocked if rear access is needed, and move vehicles away from the access line where practical. None of that is glamorous, but then neither is cleaning debris out of the wrong place after an avoidable shortcut.
Step 4: installation or repairs and quality checks
Once the site is prepared, the work itself tends to move in a disciplined sequence: remove failed sections where necessary, prepare the fixing background, install or repair the roofline components, align the runs, secure the joints, and check that the system is doing its main job, which is moving water where it should go.
Quality checks matter because neat-looking work is not automatically well-performing work. A clean visual line is important, but so are bracket spacing, outlet positioning, secure joints, and the fall that allows water to drain properly. If associated details such as verge edges or adjoining trim affect the installation, those checks should be part of the same conversation rather than treated as an afterthought.
Where local repairs are being carried out, the same principle applies. The repair should make sense as part of the whole run. If one isolated fix leaves obvious movement or weakness either side, it may not be the best fit even if it is the smallest immediate intervention.
Step 5: handover, maintenance tips, and next steps
The close-out should leave you with clarity, not a vague sense that things probably went well. A proper handover usually covers what was done, whether any adjacent items still need monitoring, and what basic maintenance will help protect the new or repaired work.
Typical advice at this point includes keeping gutters clear of heavy debris, watching for overflow during major rain events, and checking visible joints and brackets from ground level from time to time. For properties with more complicated rooflines, a simple inspection rhythm after rough weather can be a sensible habit. The HSE’s work at height FAQs are also a useful reminder that routine observation from the ground is preferable to improvised climbing.
If a minor issue remains on the watch list rather than the action list, that is not necessarily a problem. Good recommendations often distinguish between work that needs doing now and work that simply deserves monitoring. Clear prioritisation is usually more useful than theatrical urgency.
What to expect overall
From first assessment to final handover, the pattern is fairly consistent: inspect carefully, define the right scope, protect the site, complete the work methodically, then close out with practical next steps. The details vary by property, but the structure should remain legible.
If your property has visible overflow, staining, loose sections, or ageing roofline details, the safest reasonable default is to start with an informed assessment rather than guess from ground level alone. If you want to talk through the likely next step, use the contact page and describe the area of concern as precisely as you can.